Testing. The final frontier. Or so it often feels. It’s the place where no man boldly goes, it’s the place where they tend to crawl to when being forced to do so after the test coverage checker lets them know that there’s less than 60% of the line coverage. Hopefully, this is just a tired stereotype, because testing is mighty useful in all kinds of applications for quite obvious reasons: it saves time, helps catch bugs, and a good & passing test set gives a better peace of mind than a ten-minute mindfulness session. In this text, I’m writing a bit about unit testing in audio processing applications and presenting my small example plugin that contains some unit tests. It’s basically my upcoming ADC 2022 talk in a text format, unless something surprising happens in the upcoming week. Let’s hope not, I react poorly to surprises.
Testing
Unit testing is a type of testing where small sections of the program code are individually and independently scrutinized. Usually, this is done by the means of feeding known input to the functions being tested, and comparing the outputs, function calls, etc. against an expected set of values. Basic stuff, really.
However, audio applications are slightly different, or at least have some features that don’t fully follow this idea of known inputs and outputs. For example, think about a high-pass filter that adds some “character” to the signal it filters. The character here means something extra being added to the audio signal during processing. Depending on the type of “character” we may know the output only partially. Sure, the audio gets filtered according to the filter parameters, but the processing may also add some random elements, like a tiny smidgen of noise to keep things exciting. In such a situation we can’t directly compare the output of the processing function to some expected value, because the expected value is only partially known.
Of course, the test in such a case could be reduced to smaller components that have fully predictable outputs. And it could even be argued that testing these small components is the whole idea of unit testing. But even if we break down the filter into the smallest possible pieces, there still would be that one noise generator element that can’t be fully predicted (unless using the same random seed every time). How can we know what to expect when we only have a general idea of what something is supposed to sound like, but it can’t be exactly defined? As a sidenote, this kind of vague hand-waving describes my music-making fairly well.

Math to the rescue
I dislike math as much as anyone else, but no one can really disagree with the fact that it’s definitely useful. Without it, we wouldn’t have trebuchets. And from what I’ve heard, mathematics plays some role in most of the computer systems as well.
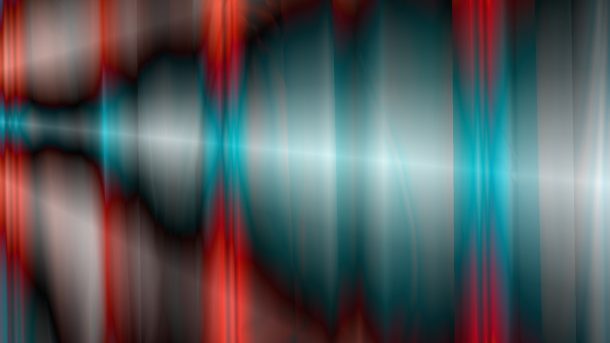
Fast fourier transform is a magica… mathematical algorithm that can perform discrete fourier transformations. Fourier transformation on the other hand can convert time or space functions to their frequency components. Or, if these words mean nothing to you, it can convert this kind of waveform image (i.e. time domain representation):

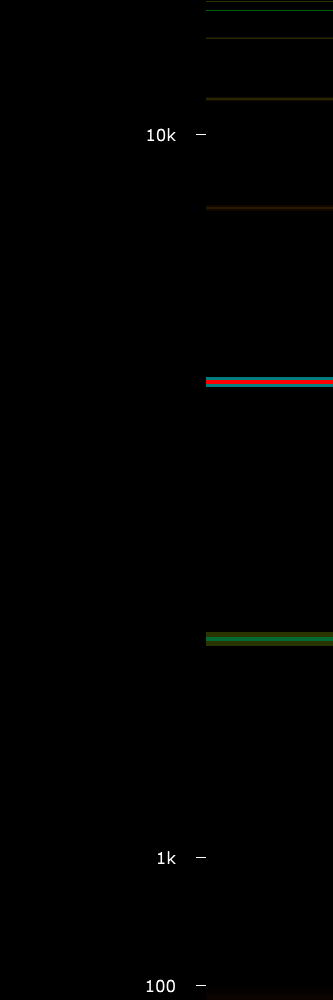
Into this kind of frequency spectrum image (frequency domain representation):
How does this happen? I wish I understood. Wikipedia article for Fourier transform is filled with sentences like “for each frequency, the magnitude of the complex value represents the amplitude of a constituent complex sinusoid with that frequency, and the argument of the complex value represents that complex sinusoid’s phase offset” and to be honest, sentences like this make me scared. For all I know, it could say that there’s a tiny wizard somewhere in the computer that has nothing better to do than some signal processing. Although, all the signal-processing people I know tend to be wizards, so maybe there’s some truth in that.
However, with the FFT we can get the characteristics of the audio, like what frequency range has a lot of energy, or where there is no energy at all. Audio signals are signals, and as such, they have some amount of energy. These kinds of frequency characteristics can be compared in non-exact, fuzzy ways by setting thresholds for the allowed energy amounts for different frequency ranges.
For example, if we have a simple gain function, we can use FFT to check that the audio signal energy is indeed increasing or decreasing. Or if there’s a filter that needs to be tested we can check that some frequency bands have no energy to ensure that the filter doesn’t allow frequencies to pass from where they shouldn’t. Or if there’s a white noise generator, it can be checked that there is energy across the whole frequency range. Or with a synthesizer, we can check that there are no unexpected artefacts in the signal. Without fast fourier transform finding out these kinds of things automatically can be tricky.
Pamplejuce
Integrating a unit testing framework with an audio development framework can be challenging. It took me surprisingly much googling to find anything useful on the topic. There were plenty of tutorials/advertisements about building different unit testing framework demos. I’m using JUCE, and it has some level of unit testing support, but that seemed insufficient. There also were conference talks confirming that yes, you indeed should test your software even if it handles audio signals, that’s not an acceptable reason to skip testing even though that’s a tempting thought.
Finally, after failing to do what I wanted with JUCE’s unit tests, and failing to integrate two different unit testing frameworks into my JUCE plugin, I came across Pamplejuce. It’s a template project using CMake workflow, and more importantly (at least for me), it integrates Catch2 unit testing framework to JUCE. It’s good that someone around here is a competent developer.
Catch2 is a unit testing framework. I don’t have much else to say about it. It’s being actively developed and it has all the features I could ask for. This isn’t all that much, I have about as many requirements for unit testing frameworks as I do for hotel rooms: hotel rooms should have a bed, a shower and a lockable door. Unit testing frameworks should have the possibility to compare two things and an option to write custom matchers. And I should be able to integrate them into my projects. The last one was surprisingly rare.
FilterUnitTest
To test out Pamplejuce I created a new imaginatively named project FilterUnitTest from the template. To have some actual audio processing to test I made a simple highpass filter plugin using JUCE’s LadderFilter. No GUI, just simple filtering pleasure. Well, it also has a parameter for the wet amount. I’ll give a warning that there’s still plenty of refactoring & warning fixing to be done in the FilterUnitTest, but I’m currently working on it whenever I have the time. I’m quite certain that the tests at least leak memory, but I haven’t yet gotten around to fixing that (I know, I know, it isn’t very C++17 to have memory leaks).
So, after the base of the project was done, it was time to finally implement some tests. First is the dummy test already part of the Pamplejuce template, which simply checks that the name of the plugin can be fetched and that it is actually the expected name. The best test is the one someone writes for you. The test cases presented in this blog text can be found from Tests/PluginBasics.cpp file in the FilterUnitTest repository.
TEST_CASE("Plugin instance name", "[name]")
{
    testPluginProcessor = new AudioPluginAudioProcessor();
    CHECK_THAT(testPluginProcessor->getName().toStdString(),
               Catch::Matchers::Equals("Filter Unit Test"));
    delete testPluginProcessor;
}
To verify the actual functionality of the program, I identified two things that need to be tested:
- Testing that the filter performs filtering to the audio signal
- Testing that the wet parameter controls the amount of applied filtering
The first test is quite simple: create an audio signal buffer, or read it from an audio file. Run it through the audio processing function, and check that the output contains less energy than before filtering. This of course requires writing a custom matcher, more on that a bit later. If you’ve set your filtering function in stone, you could consider storing the output from one of the test runs and comparing the test results to that instead. During the development phase, it may be easier to do some non-exact comparisons of the FFT values.
If you choose to go the exact value comparison route, you can check out the writeBufferToFile and readBufferFromFile helper functions in Tests/Helpers.h. They serialize and deserialize an audio buffer to/from a file. These helpers can be used to create the exact expected values, and they can also be used to fetch the expected value and compare the output to it. This dummy test basically writes a random buffer to a file, reads the file and ensures that the two buffers have identical contents.
TEST_CASE("Read and write buffer", "[dummy]")
{
    juce::AudioBuffer<float> *buffer = Helpers::generateAudioSampleBuffer();
    Helpers::writeBufferToFile(buffer, "test_file");
    juce::AudioBuffer<float> *readBuffer = Helpers::readBufferFromFile("test_file");
    CHECK_THAT(*buffer,
               AudioBuffersMatch(*readBuffer));
    juce::File test_file ("test_file");
    test_file.deleteFile();
}
As you can see, this type of test requires a custom matcher, AudioBuffersMatch. As does the FFT comparison, and any other custom comparison. For FilterUnitTest, I wrote four different types of comparators, these can be found from Tests/Matchers.h:
- Audiobuffers are equal
- Audiobuffer has higher energy than another audio buffer
- Audiobuffer has a maximum energy of N in its frequency bands (N can vary between different bands, and the check for a band can also be skipped)
- Audiobuffer has minimum energy of N in its frequency bands (Same here)
The second approach of using FFT to ensure that the audio buffer has lower energy after filtering can use a combination of the second and third matcher. By combining these two, we can ensure that the total energy of the signal is indeed lower and that the amount of lower frequencies is within a certain limit:
TEST_CASE("Filter", "[functionality]")
{
    int samplesPerBlock = 4096;
    int sampleRate = 44100;

    testPluginProcessor = new AudioPluginAudioProcessor();

    //Helper to read a sine sweep wav
    juce::MemoryMappedAudioFormatReader *reader = Helpers::readSineSweep();
    juce::AudioBuffer<float> *buffer = new juce::AudioBuffer<float>(reader->numChannels, reader->lengthInSamples);
    reader->read(buffer->getArrayOfWritePointers(), 1, 0, reader->lengthInSamples);

    juce::AudioBuffer<float> originalBuffer(*buffer);

    //Dismiss the partial chunk for now
    int chunkAmount = buffer->getNumSamples() / samplesPerBlock;

    juce::MidiBuffer midiBuffer;

    testPluginProcessor->prepareToPlay(sampleRate, samplesPerBlock);

    //Process the sine sweep, one chunk at a time
    for (int i = 0; i < chunkAmount; i++) {
        juce::AudioBuffer<float> processBuffer(buffer->getNumChannels(), samplesPerBlock);
        for (int ch = 0; ch < buffer->getNumChannels(); ++ch) {
            processBuffer.copyFrom(0, 0, *buffer, ch, i * samplesPerBlock, samplesPerBlock);
        }

        testPluginProcessor->processBlock(processBuffer, midiBuffer);
        for (int ch = 0; ch < buffer->getNumChannels(); ++ch) {
            buffer->copyFrom(0, i * samplesPerBlock, processBuffer, ch, 0, samplesPerBlock);
        }
    }

    //Check that originalBuffer has higher total energy
    CHECK_THAT(originalBuffer,
               !AudioBufferHigherEnergy(*buffer));

    juce::Array<float> maxEnergies;
    for (int i = 0; i < fft_size / 2; i++) {
        //Set the threshold to some value for the lowest 32 frequency bands
        if (i < 32) {
            maxEnergies.set(i, 100);
        }
        //Skip the rest
        else {
            maxEnergies.set(i, -1);

        }
    }
    //Check that lower end frequencies are within limits
    CHECK_THAT(*buffer,
               AudioBufferCheckMaxEnergy(maxEnergies));

    //I guess programming C++ like this in the year 2022 isn't a good idea to do publicly
    delete buffer;
    delete reader;
    delete testPluginProcessor;
}
The second test for testing the wet parameter is basically a continuation of this. Get your audio buffer and run it through the audio processing function with varying levels of wet-parameter. Ensure that the higher the wet parameter is, the higher the filtering effect. This means there’s again less low-end energy, and less energy in general. Or if you want to do a super simple test as I did, just check that with a wet value of 0 signal doesn’t change, and with the max wet parameter value of 1 it does.
TEST_CASE("Wet Parameter", "[parameters]")
{
    testPluginProcessor = new AudioPluginAudioProcessor();
    //Helper to generate a buffer filled with noise
    juce::AudioBuffer<float> *buffer = Helpers::generateAudioSampleBuffer();
    juce::AudioBuffer<float> originalBuffer(*buffer);

    juce::MidiBuffer midiBuffer;

    testPluginProcessor->prepareToPlay(44100, 4096);
    testPluginProcessor->processBlock(*buffer, midiBuffer);

    //Check that initial value of wet is not zero, i.e. filtering happens
    CHECK_THAT(*buffer,
               !AudioBuffersMatch(originalBuffer));

    delete buffer;

    buffer = Helpers::generateAudioSampleBuffer();

    //Get and set parameter
    auto *parameters = testPluginProcessor->getParameters();
    juce::RangedAudioParameter* pParam = parameters->getParameter ( "WET"  );
    pParam->setValueNotifyingHost( 0.0f );

    for (int ch = 0; ch < buffer->getNumChannels(); ++ch)
        originalBuffer.copyFrom (ch, 0, *buffer, ch, 0, buffer->getNumSamples());
    testPluginProcessor->processBlock(*buffer, midiBuffer);

    //Check that filter now doesnt affect the audio signal
    CHECK_THAT(*buffer,
               AudioBuffersMatch(originalBuffer));

    delete buffer;

    buffer = Helpers::generateAudioSampleBuffer();
    pParam->setValueNotifyingHost( 1.0f );


    for (int ch = 0; ch < buffer->getNumChannels(); ++ch)
        originalBuffer.copyFrom (ch, 0, *buffer, ch, 0, buffer->getNumSamples());
    testPluginProcessor->processBlock(*buffer, midiBuffer);

    //Finally, check that with max wet the signal is again affected
    CHECK_THAT(*buffer,
               !AudioBuffersMatch(originalBuffer));

    delete buffer;
    delete testPluginProcessor;
}
I wish I could argue which approach is better here, but I think it’s quite apparent whether or not it’s better to do proper or half-assed testing. I’ll leave it as an exercise for the reader to figure out how to do the proper way of testing.

Images
If you’re given the following sample values, can you figure out what the audio signal sounds like?
[0.25, -0.59, 0.96, 0.21, -0.22, -0.36, -0.45, -0.14, 0.39, 0.35, 0.87, 0.64, -0.32, 0.12, -0.86, -0.67], repeated ad nauseam
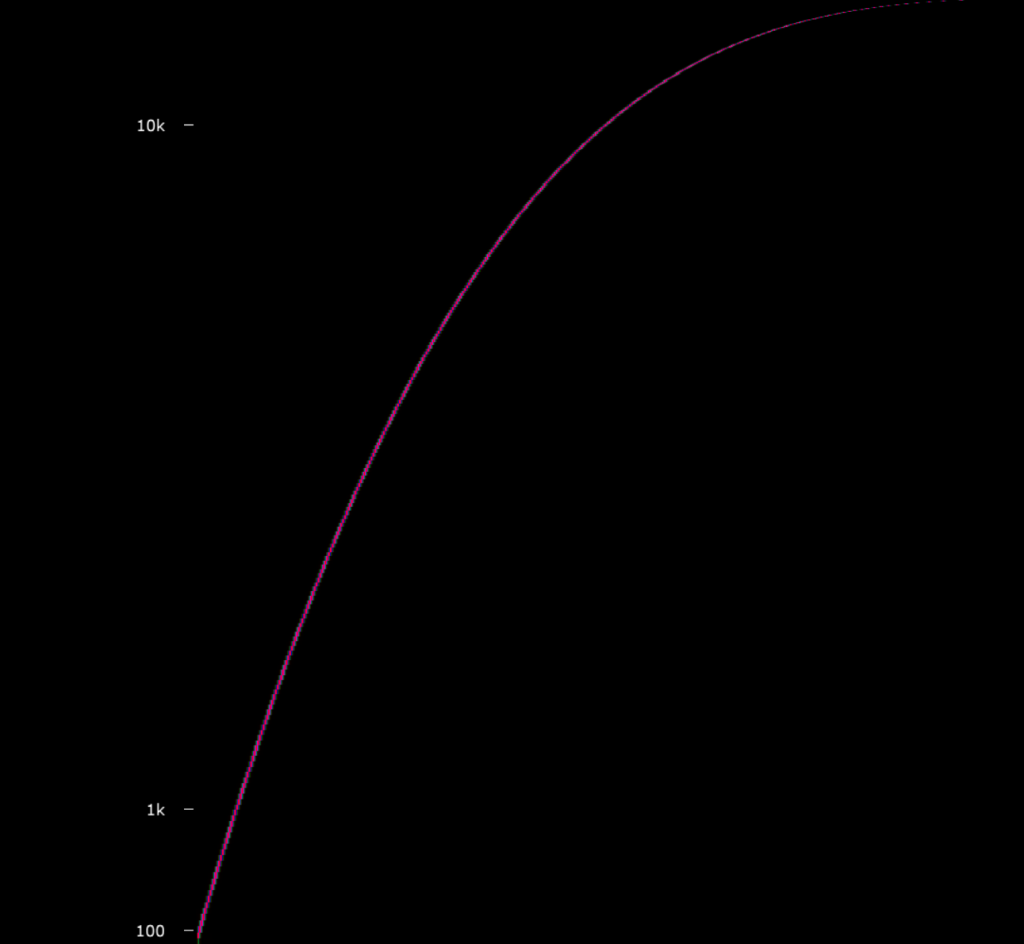
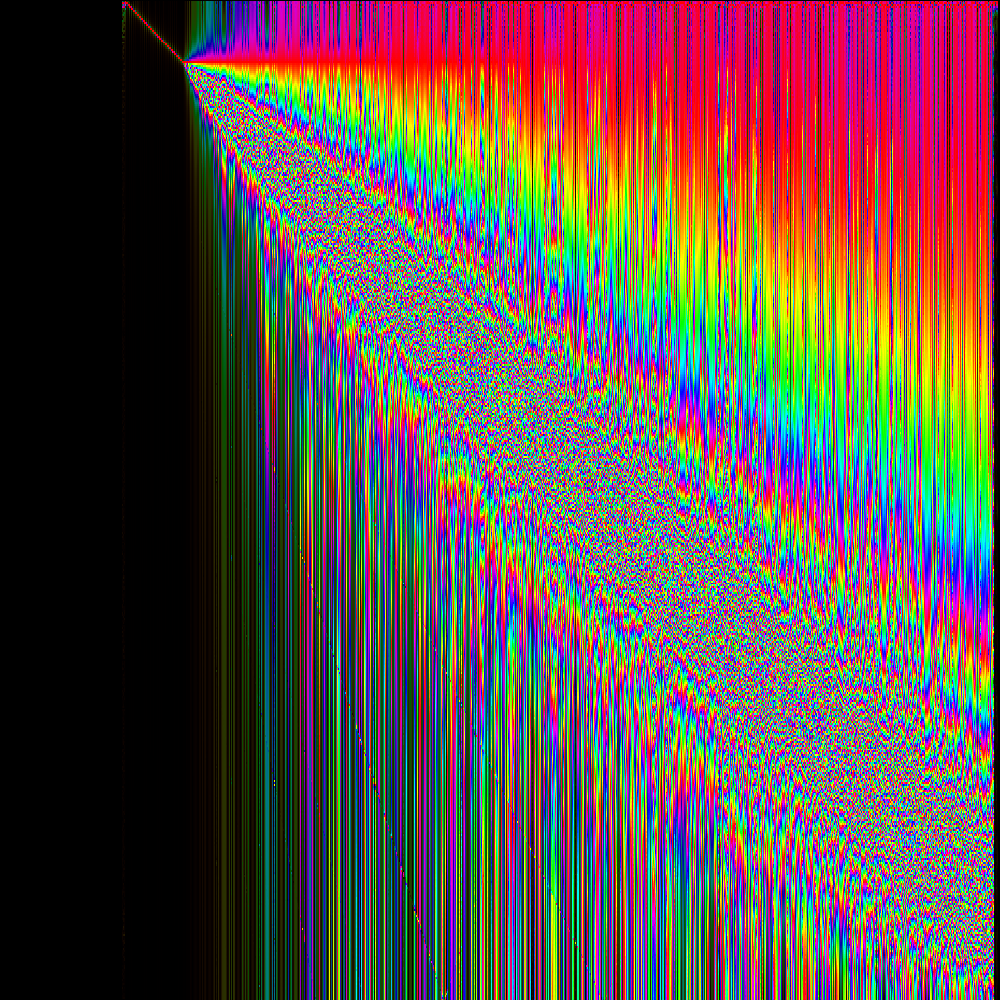
I don’t know either. In general, humans tend to absorb information via visual means. A bunch of decimal numbers isn’t the most intuitive way of understanding something unless you’re one of the wizards I talked about earlier. But what if I showed you this:
As you can see (pun intended) visual information is a lot easier to digest. It’s not the most impressive of graphs really, nor the easiest to read, but there’s a good explanation for that: I wrote the code for it. At least the code allows easy drawing of images as a part of unit tests to see what’s going on with the inputs and outputs, as opposed to printing out audio buffer contents and FFT results and hoping that staring at the numbers absorbs them into the brain. You can find the image drawing function from Tests/ImageProcessing.h, here it is in action:
juce::AudioBuffer<float> *buffer = Helpers::generateBigAudioSampleBuffer();
ImageProcessing::drawAudioBufferImage(buffer, "NoiseBuffer");
Just give it a buffer and a filename without the .png extension and it’ll handle the rest. So, for example to make sure you’ve hooked things up correctly in your testing set-up, you can call the drawing function before and after doing some processing to the audio signal to see if the changes are at least somewhat sensible.
Benchmarking
Imagine you’re in an all-you-can-eat buffet. You can eat whatever as much as you want and the staff won’t kick you out for a few hours. Usually eating a lot feels like a good idea. However, after you’ve stopped eating, the reality of the situation settles in and you realize that it wasn’t a good idea. You feel sick.
The same applies to coding. It’s fun to code without limits. More features, more, MORE, you’ll think to yourself. However, after coding for a while you’ll realize that this wasn’t a good idea either. The program starts to become slow and sluggish. You’ve introduced latency to your code, and that is the second worst thing that can be done. The only thing worse is a 127 dBFS pop that was caused by careless buffer handling when you were starting out with audio signal processing.
To keep things in check, Catch2 has some simple benchmarking macros. There are a few example usages of those in FilterUnitTest-repo. It’s quite basic C++, meaning that it took me about three compilation attempts and one illegal memory access to get the syntax right. After some trials and a lot of errors, I ended up with something like this:
TEST_CASE("Processblock Benchmark", "[benchmarking]")
{
    testPluginProcessor = new AudioPluginAudioProcessor();
    juce::AudioBuffer<float> *buffer = Helpers::generateAudioSampleBuffer();

    juce::MidiBuffer midiBuffer;

    testPluginProcessor->prepareToPlay(44100, 4096);

    //Example of an advanced benchmark with varying random input
    BENCHMARK_ADVANCED("Plugin Processor Processblock ADVANCED")(Catch::Benchmark::Chronometer meter) {
        juce::Array<juce::AudioBuffer<float>> v;
        for (int j = 0; j < meter.runs(); j++) {
            v.add(*Helpers::generateAudioSampleBuffer());
        }
        meter.measure([&v, midiBuffer] (int i) mutable { return testPluginProcessor->processBlock(v.getReference(i), midiBuffer); });
    };

    delete buffer;
    delete testPluginProcessor;
}
Closing words
I hope you found this blog post useful. As mentioned, I was struggling to get started with JUCE and unit testing, so hopefully this writing helps you to think about how to test your application, assists in integrating a unit testing framework, and contains some useful and practical resources to get you started with testing. Also, I want to say that this type of FFT matching isn’t the only solution for unit-testing audio applications. You can for example remove the random elements from your tests, use pre-determined random seeds, or mock some parts of your code if needed. I’ve just found the FFT approach really intuitive and flexible after I got my head wrapped around it. Thanks for reading!
Comments are welcome but due to a quite hefty amount of bot spam, the comments will go through moderation so it may take some time to see your prose in the comments section. As long as you’re not trying to sell Viagra or women’s haircuts to me it’ll eventually appear there. If you happen to be going to ADC 2022 feel free to let me know!