It’s time to finish a project. Lately, I have been mostly interested in embedded tinkering, but I’m also fascinated by audio and DSP programming. Partially because it is an interesting field, but mostly because I make music as a hobby so it’s interesting to see how the virtual instruments and audio effects work. So, in this text I’m presenting my first full-fledged and complete VST plug-in, Pastel Distortion. In a way it’s my second plug-in, as I used to make Delayyyyyy plug-in (that’s mentioned in some older texts of this blog as well), but that project has been abandoned in a state that I can’t quite call complete. However, here’s a screenshot of something that I actually have completed:
In short, VST plug-ins are software used in music production. They create and modify the sound based on the information they’re given by the VST host, that is usually a digital audio workstation. Plug-ins are commonly chained together so that one plug-in’s output is connected to the next one’s input. This is all done real-time, while the music is playing.
There will be free downloads at the end, but first, let’s go through the history of the project, some basic theory, and a six-paragraph subchapter that I like to call “I’m not sponsored by JUCE, but I should be”.
History of the Project
About two and a half years ago I started working on a distortion VST plug-in following this tutorial. Half a year after that, I got distracted when I thought about testing the plug-in (which resulted in this blog text and my first conference talk). As a side note, it may tell something about the development process and schedule when testing is “thought about” six months after starting the project. A year after that I got a Macbook for Macing Mac builds and got distracted by the new shiny laptop. And some time after that I made some overenthusiastic plans for the plug-in that didn’t quite come to reality and then I forgot to develop the plug-in.
The timeline is almost as confusing as Marvel Multiverse and full of delays, detours and time loops. In the end, I’ve just come to a conclusion that I’ll release this Pastel Distortion as it is, and add the new cool features later on if there’s interest in the plug-in. If there’s no interest, I can start working on a new plug-in, so it’s a win-win situation. But let’s finish this first.
What Is Waveshaping Distortion?
The Physics
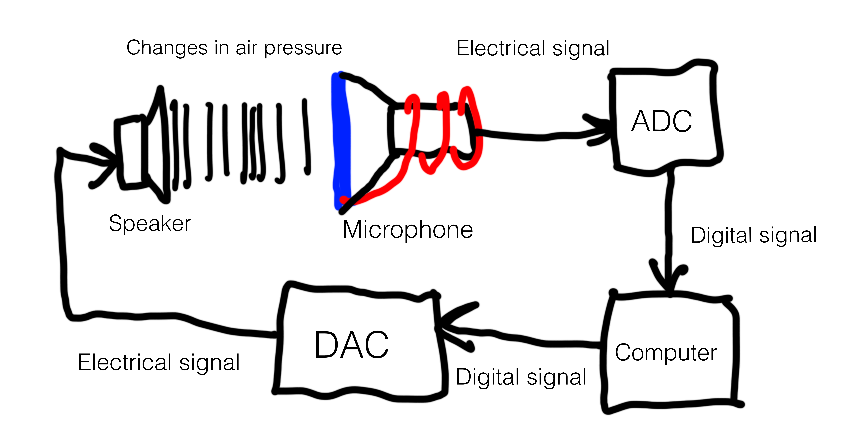
In the real world that surrounds us all, sound is a change of pressure in a medium. Our ears then receive these changes of pressure and turn them into some sort of electricity in the brain. In short, it’s magic, that’s the best way I can explain it. To translate this into the world of computers, a microphone receives changes of pressure in air and converts them into changes in electricity that an analogue-to-digital converter then turns into ones and zeros understood by a computer. Magic, but of a slightly different kind.
After this transformation, we can process the analogue sound in the digital domain, and then convert it back into an analogue signal and play it out from speakers. Commonly the pressure/voltage changes get mapped into numbers between some range. One common range is [-1.0, 1.0]. -1.0 and 1.0 represent the extreme pressure changes where the microphone’s diaphragm is at its limit positions (=receiving loud sound), while the value of 0 is the position where it receives no pressure (receiving= silence).
The Maths
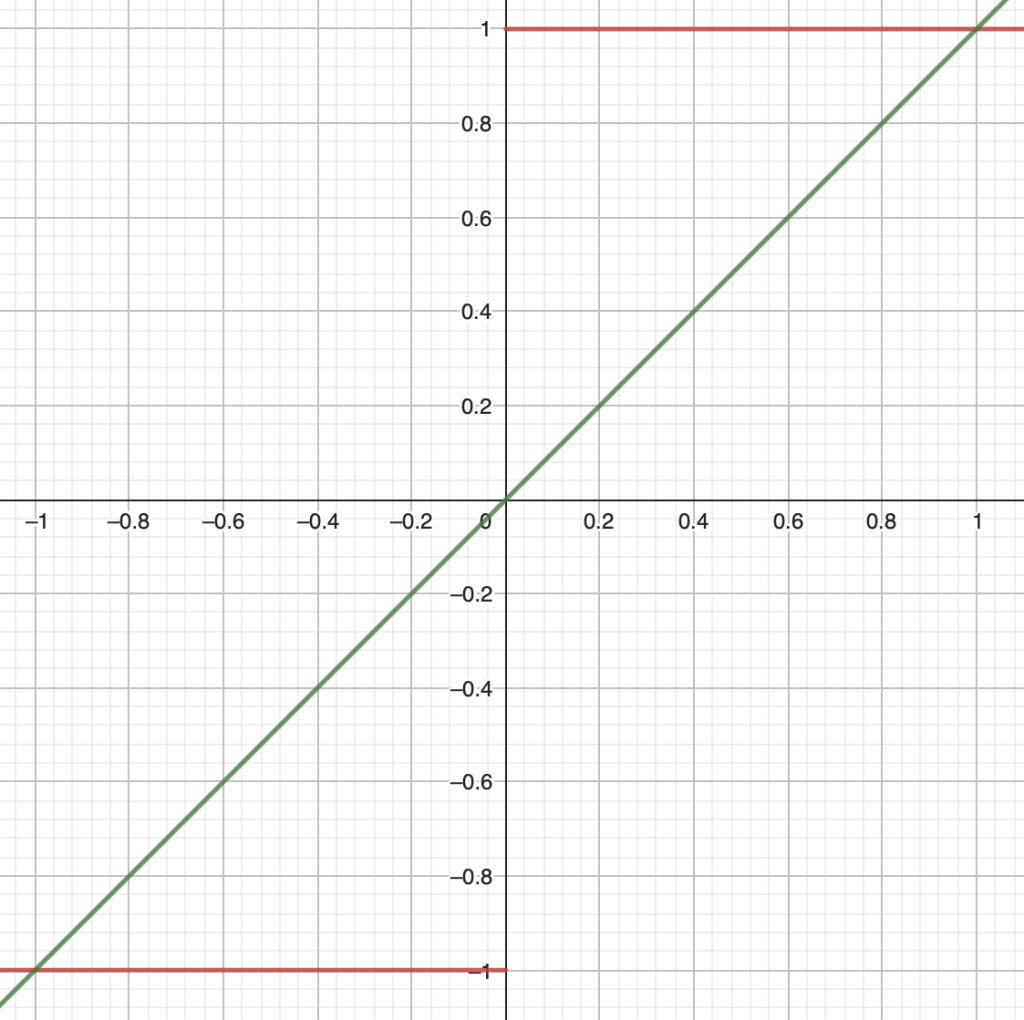
Now we’ve established what sound is. But what is waveshaping distortion? You can think of it as a function that gets applied to the sampled values. Let’s take an example function that does not actually do any shaping, y=x:
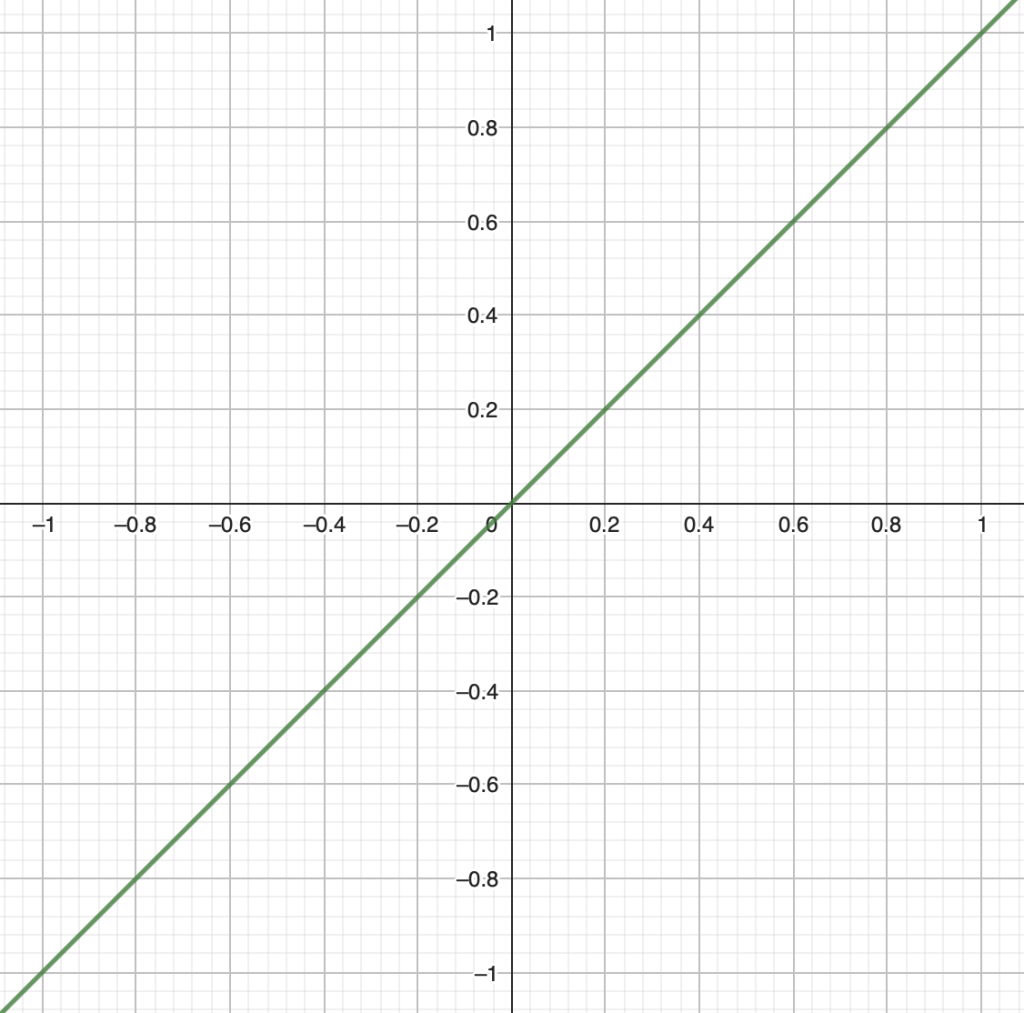
This is quite possibly the dullest shaping function. It takes x as an input, and returns it. However, this is in theory what waveshaping does. It takes the input samples from -1.0 to 1.0, puts them into mathematical function, and uses output for new samples. Let’s take another example, y=sign(x):
This takes an input sample and outputs one of the extreme values. You can emulate this effect by turning up the gain of a microphone, shoving the mic in your mouth, and screaming as loud as possible. It’s not really a nice effect. Finally, let’s take a look at a useful function, y=sqrt(x) where x >= 0, y=-sqrt(-x) where x < 0:
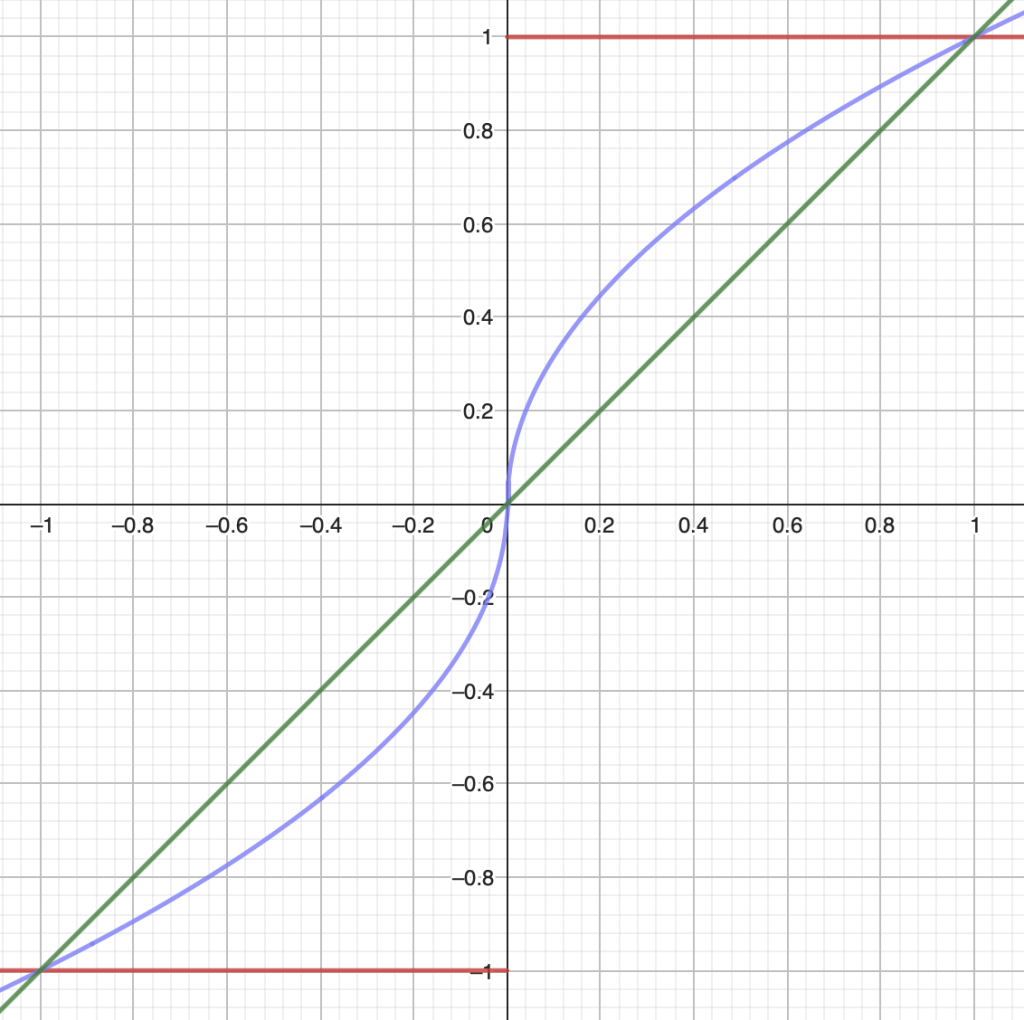
Finally, we get a function that does something but isn’t too extreme. This will create a sound that’s more pronounced because the quieter samples get amplified. Or, in other words, values get mapped further away from zero. The neat part is that the waveshaper function can be pretty much anything. It can be a simple square root curve like here. It also can be a quartic equation combined with all of the trigonometric functions (assuming your processor can calculate it fast enough). Maybe it doesn’t sound good, but it’s possible.
But Why Bother?
It’s always a good idea to think why something is done. Why would I want to use my precious processor time to calculate maths when I could be playing DOOM instead? As an engineer, I’m not 100% sure, I think it has something to do with psychoacoustics which is a field of science of which I know nothing about and to be honest it sounds a bit made up. From a music producer’s point of view, I can say that distortion effects make the sound have more character, warmth, and loudness (and other vague adjectives which don’t mean anything), so it’s a good thing.
Implementing the Distortion
I have talked about JUCE earlier in this blog, but I think that’s been so long ago that it’s forgotten. So I’ll summarize it shortly again. It’s a framework for creating audio software. It handles input and output routing, VST interfacing, user interface, and all that other boring stuff so that we can focus on what we actually want to do: making the computer go bleep-bloop.
The actual method of audio signal processing may vary between different types of projects. For a VST audio effect like this, there usually is a processBlock function that receives an input buffer periodically. It is then your duty as a plug-in developer to do whatever you want with that input buffer and fill it with values that you deem correct. Doing all this in a reasonable amount of CPU time, of course.
In this Pastel Distortion plug-in, we receive an input buffer filled with values ranging from -1.0 to 1.0, and then we feed those samples to the waveshaping function and replace the buffer contents with the newly calculated values. Sounds simple, and to be honest, that’s exactly what it is because JUCE does most of the heavy work.
JUCE has a ProcessorChain template class that can be filled with various effects to process the audio. There’s a WaveShaper processor, to which you simply give the mathematical function you want it to perform, and the rest is done almost automatically! As you can guess, the plug-in uses that. In the plug-in there are also some filters, EQs, and compressors to tame the distorted signal a bit more because the distortion can start to sound really ugly really quickly. That doesn’t mean that you can’t create ugly sounds with Pastel Distortion, quite the contrary.
The life of a designer is a life of fight: fight against the ugliness
Another great feature of JUCE is that it has a graphics library built-in. It’s especially good in a sense that an embedded developer like me can create a somewhat professional-looking user interface, even though I usually program small devices where the only human-computer interaction methods are a power switch and a two-colour LED. Although I have to admit, most of the development time went into making the user interface. You wouldn’t believe the amount of hours that went into drawing these little swirls next to the knobs.

All in all, Pastel Distortion is a completed plug-in that I think is quite polished (at least considering the usual standards for my projects). There’s the distortion effect of course, but in addition to that there’s tone control to shape the distortion and output signal, a dry-wet mixer for blending the distorted and clean signal, and multiple waveshape functions to choose from. Besides GUI, I also spent quite a lot of time tweaking the distortion parameters, so hopefully that effort can be heard in the final product.
There’s still optimization that could be done, but the performance is in fairly good shape already. At least compared to the FL Studio stock distortion plug-in Disructor it seems to have about the same CPU usage. Disructor averages at around 8%, while Pastel Distortion averages at 9%. Considering the fact that my previous delay plug-in used about 20% I consider this a great success. This good number is most likely a result of the optimizations in JUCE and not because of my programming genius.
But enough talk, let’s get to the interesting stuff. How to try this thing out?
Getting Pastel Distortion
Obtaining Pastel Distortion plug-in is quite easy. Just click this link to go to the Gumroad page where you can get it. And if you’re quick, you can get it for free! The plug-in costs $0 until the end of February 2024. After that you can get the demo version for free to try it out, or if you ask me I can generate some sort of a discount code for it (I’d like to get feedback on the product in exchange for the discount).
If you don’t want to download Pastel Distortion but want to see it in action, check out the video below. I put all the skills I’ve learned from Windows Movie Maker and years of using Ableton into this one:
That’s all this time. I’ve already started working on the next plug-in, let’s hope that it won’t take another two and a half years. Maybe the next text will be out sooner than that when I get something else ready that’s worth writing about. I’ve been building a Raspberry Pi Pico-based gadget lately, and it got a bit out of hand, but maybe I’ll finish that soon.