In my last blog post, I said that I wanted to try finishing a project instead of starting a new one. Let’s forget that and kick off a new project. In my defense, I started working on this idea a few months ago already, and now I am (mostly) finishing it.
Back then I thought that it would be fun to have a retro-style camera. An analog camera would be neat, but developing films in this day and age is a bit of a pain. Early 2000s digital camera could be an option, but paying for one of those would be a bit of a waste. I mean, they cost maybe 10€, but it’s more a matter of principle. A Polaroid camera would tick all the boxes, but that idea didn’t come to my mind.
Then I thought why not build a digital camera? Well, for starters, it takes some effort that’s definitely worth more than 10€. Also, it takes some materials that are worth more than 10€. So yeah, all around a silly idea. Let’s do it.
Camera Lens
When I say that I’m going to build a camera it doesn’t mean building a lens. Those are quite precise devices, and it would be quite a bold claim to say that I possess the skills or facilities to make them. Instead, I had to salvage one from somewhere. Fortunately, every laptop contains a camera lens in the form of a webcam, and I have some spare laptops lying around. Also, the benefit of using a laptop webcam as a camera lens is that it contains a controller that can usually be interfaced with USB.
So, it’s time to get the fine-tuning hammer and give my ancient laptop a light tap with it:
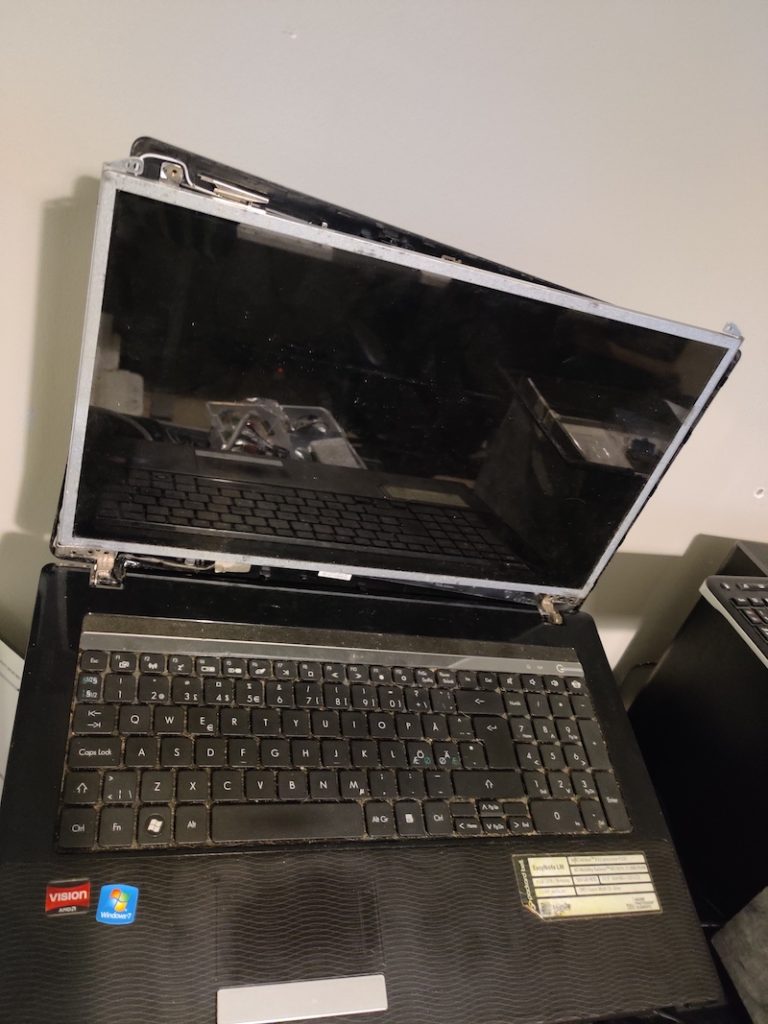
This process of course varies from laptop to laptop, but usually “<laptop name> disassembly” search from Google is a good starting point. There is always a small random repair shop that has made a disassembly video for your laptop. After the webcam is within reach, it’s just a matter of cutting the wires and terminating them. Not a good idea to have unterminated wires inside a laptop, at least if it’s still going to be used.
So now I have the camera module for my camera. I just need to figure out how to connect it to anything. The wires didn’t seem to follow any standard coloring scheme, and after some googling, I couldn’t find any standard order of the wires either. However, there is this useful information printed on the silk screen underneath a sticker in the back:
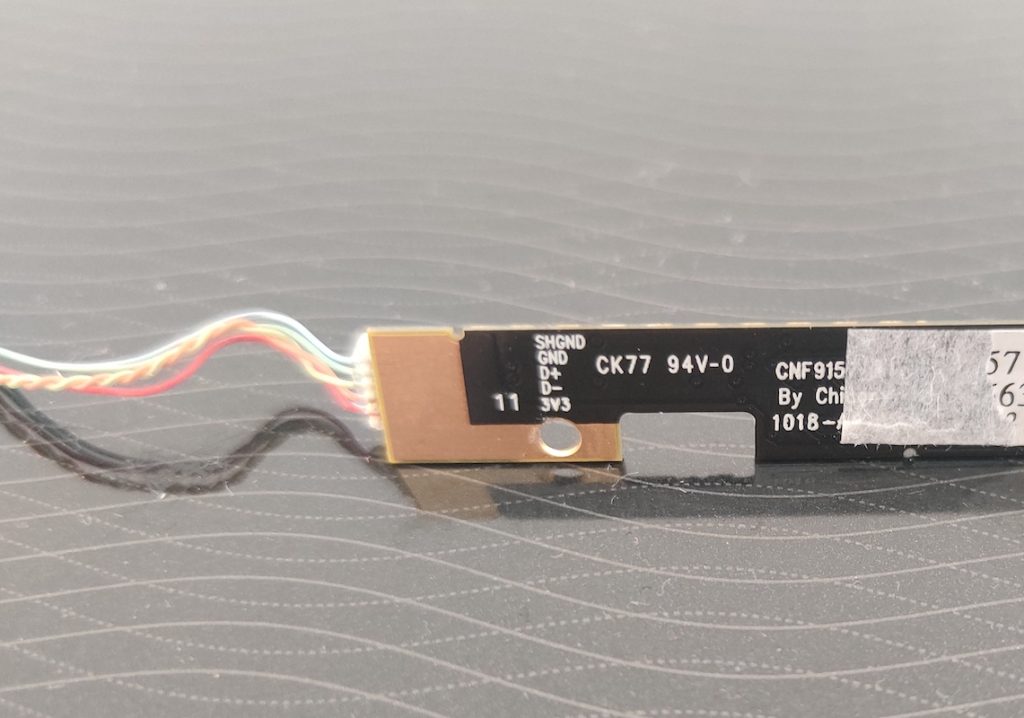
The next thing to do is solder the power of the webcam to the power of a USB cable, ground to ground, D+ to D+, and D- to D-, right? Wrong (maybe). I’m not sure if someone has mislabeled the wires or if I just messed them up, but soldering D+ of the webcam to D+ of the USB cable (and the same for D-) resulted in following errors in Linux when plugging in the device.
kernel: usb 4-1: new low-speed USB device number 14 using ohci-pci
kernel: usb 4-1: device descriptor read/64, error -62
kernel: usb 4-1: device descriptor read/64, error -62
kernel: usb 4-1: new low-speed USB device number 15 using ohci-pci
kernel: usb 4-1: device descriptor read/64, error -62
kernel: usb 4-1: device descriptor read/64, error -62
kernel: usb usb4-port1: attempt power cycle
kernel: usb 4-1: new low-speed USB device number 16 using ohci-pci
kernel: usb 4-1: device not accepting address 16, error -62
kernel: usb 4-1: new low-speed USB device number 17 using ohci-pci
kernel: usb 4-1: device not accepting address 17, error -62
kernel: usb usb4-port1: unable to enumerate USB device
This is where I gave up a few months ago on my first try. I was too sad to go on.

The Project: Rebirth
Fast forward two months. I saw an ad for a contest. The competition was looking for something that could be described as “overengineered DiWhy” projects, but maybe in a bit more positive sense. After seeing the ad, and realizing the fact that a 3D printer was available as a reward, I knew what I had to do: finish the digital camera.
So I dug up the abandoned project and soldered D+ to D- and D- to D+, plugged the thing in, and was pleasantly surprised that it actually now worked and I hadn’t caused a heat death of the device with careless soldering. The final schematic ended up looking like this:
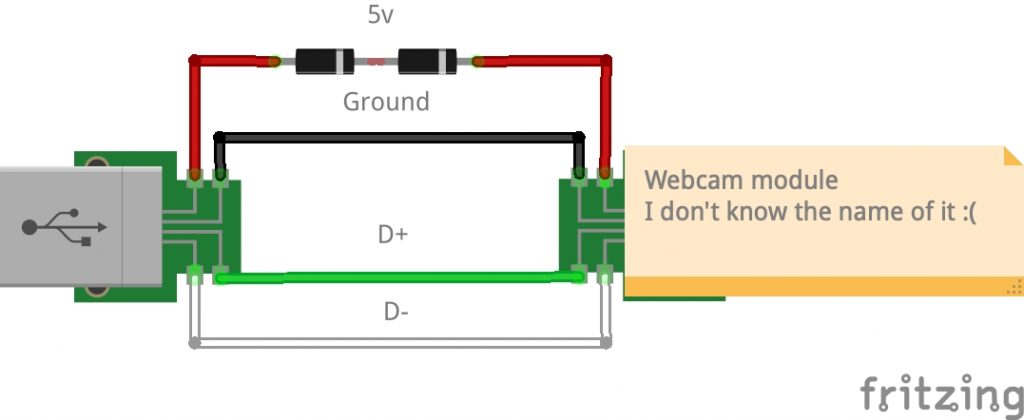
Two 1N4001 diodes are used to drop the voltage from the USB’s 5V closer to the 3.3V expected by the camera module. After reading some blog posts about similar projects it seemed like some other people had had the same problem with D+ and D-, so it may be a common point of confusion.
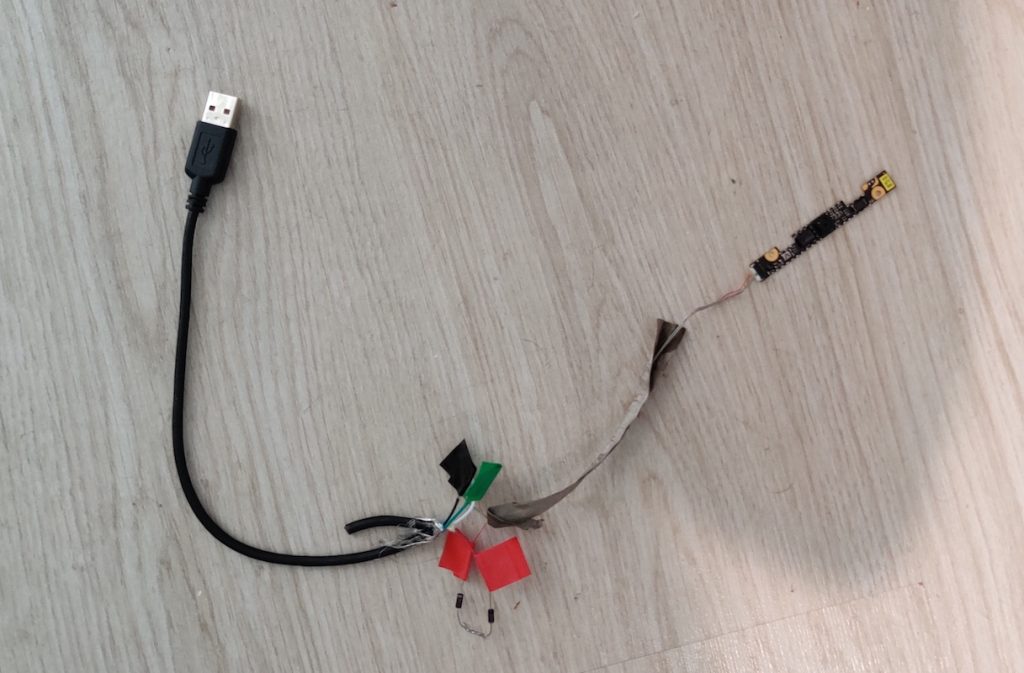
The next step was coming up with a plan for what to actually do with this thing. I ended up using a Raspberry Pi powered by a power bank and creating a small control/status board using GPIO pins of Raspberry Pi.
Control/Status Board
I put together all my entry-level electronics knowledge and tried to remember which way the LED should be connected. I failed. After googling some basic Arduino tutorials for children, I came up with this kind of schematic.
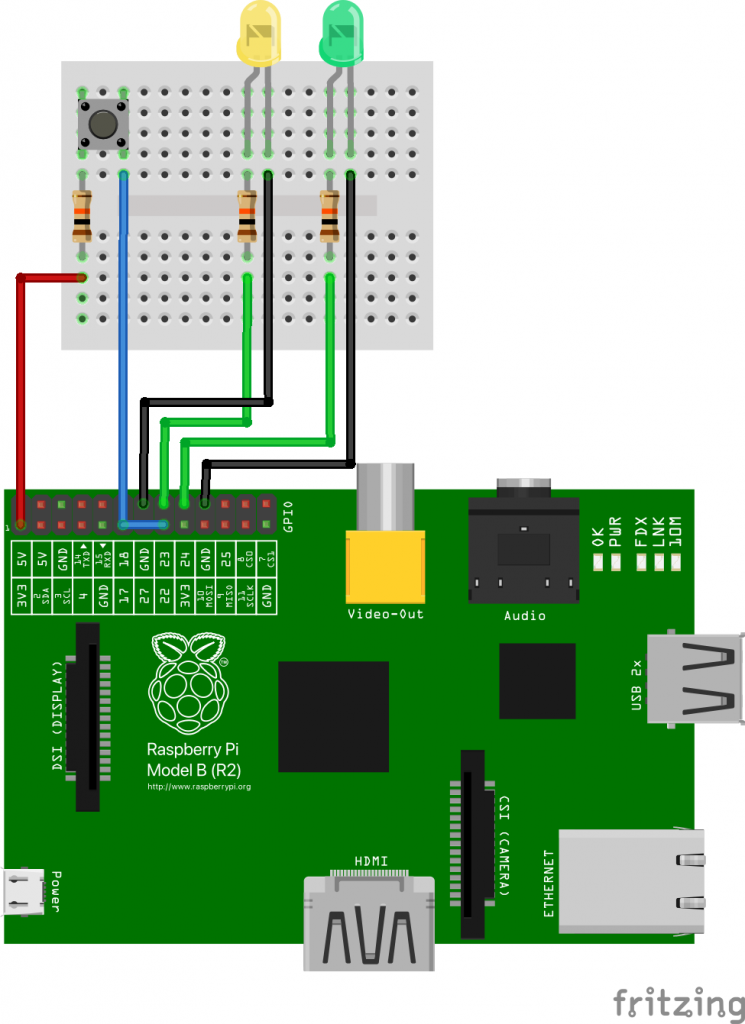
To be honest, I don’t quite understand electronics as well as I would want to, and I’m not 100% sure if the resistors are the correct size. At least the board works and doesn’t produce audio-visual bang-smoke output, so I guess it’s good? Or maybe I’m slowly but steadily causing some irreparable damage that will manifest itself in surprising and slightly disappointing ways? Only time will tell.
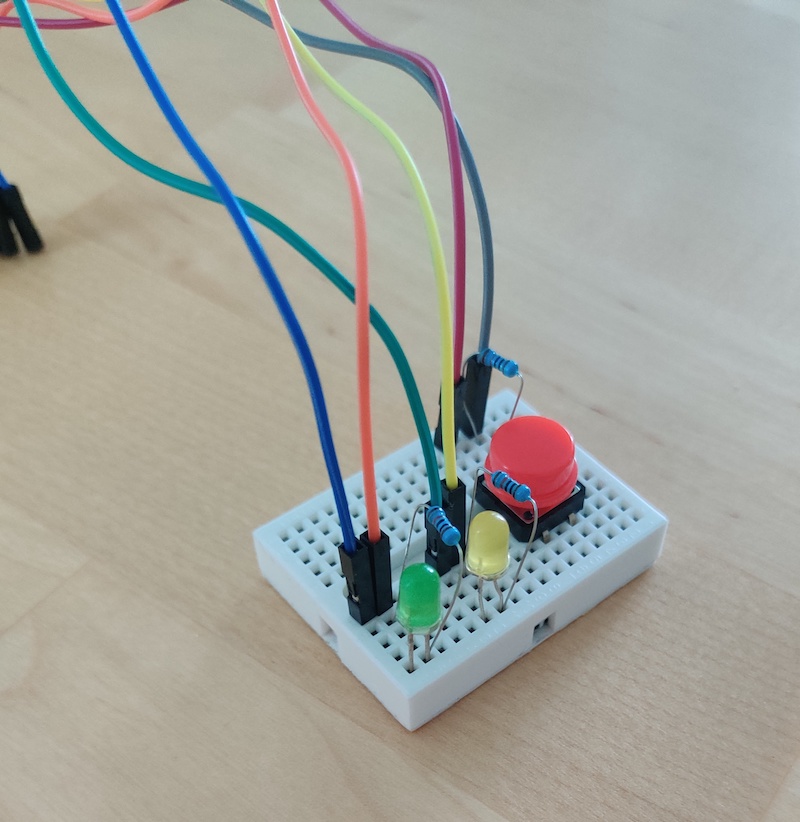
The purpose of the button is quite obvious: press it to take a picture. The LEDs give an indication of the system’s status. One LED turns on when the device is listening to button presses and ready to take pictures. The second one turns on when a picture is being taken (it’s a surprisingly long process).
I’ve Got the Power
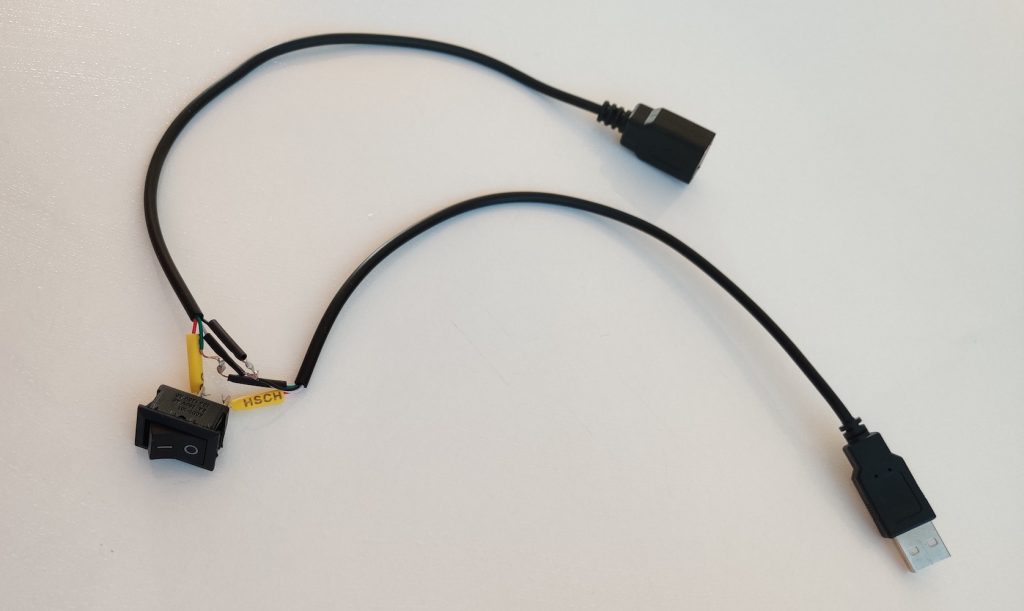
To power up the Raspberry Pi I used a power bank that has enough juice to power up the device. It’s Anker Powercore II 10000 that outputs 5V and 3A, which is within the recommended limits. In addition, I “soldered” a switch to the power wire of the USB cable to have a rudimentary power button. “Soldered” is in quotes, because I tried new lead-free solder for the first time, and nothing really stuck on anything despite the maximum heat and effort, so it was closer to suffering than soldering.
Software
This type of device could use two software components:
- A program that handles GPIO input and output
- A program that captures the camera frame and outputs the image
I wanted to write a program that would actually communicate with the camera module, but because I had to finish the camera in time for the contest, I opted for an existing solution. fswebcam is a command line software that can be used to capture frames from a webcam, which is exactly what we’re going to do.
The first piece of code I wrote is camera-gpio. It turns on the standby LED, polls the button state, and turns on another LED if an image is being taken. If the button is pressed camera-gpio launches the second program that actually takes the picture. Quite self-explanatory. It’s a C program that’s built with CMake, because I wanted to refresh my memory on how those work.
The second code repo is camera-handler, and it’s for the program that takes the photo. Currently, it’s pretty much just a wrapper for fswebcam. camera-handler also generates filenames for the images from the system time, which is a bit useless because the board doesn’t have RTC or NTP to store or sync the time. But you have to consider the opportunities, all the things it could be! It’s a C++ program that’s built with autotools, because I wanted to refresh my memory on how those work.
If you’ve been reading this blog before, you may know what comes next: Yocto build. In addition to these code repos, I made a meta-layer named meta-camera with the required files to build these into a Linux firmware image ready to be flashed into an SD card.
Final Schematic and Photos
Once all the pieces were ready, all that was left to do was plug in the thingys, boot up the thingy, and hope for the best.
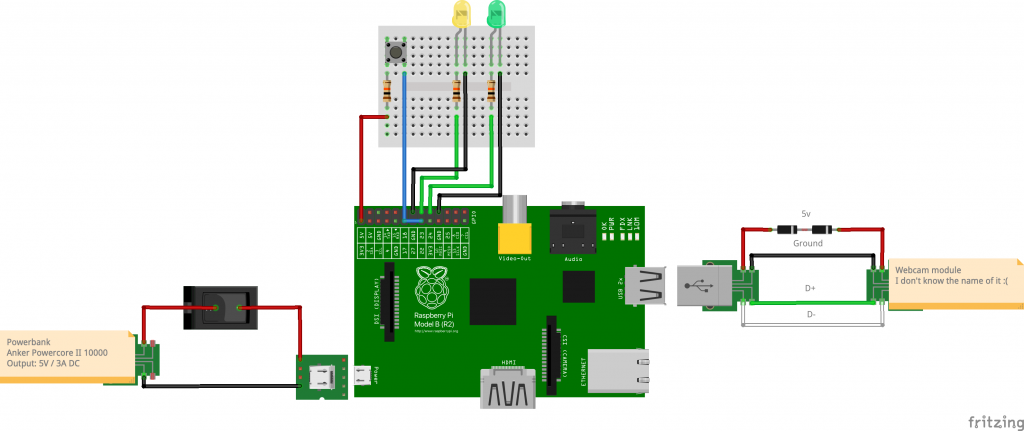
Hope is a powerful thing. It may lead to a semi-functional thingy that takes pictures. Here’s a picture of the final build:
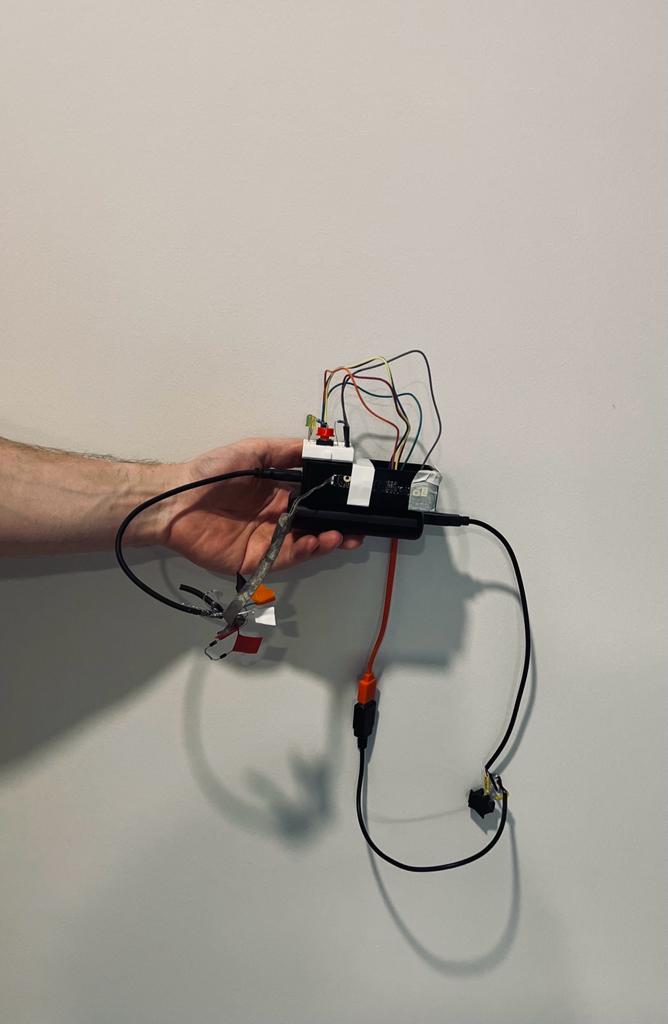
Beautiful. I posted this picture earlier on Linkedin and considered sorting out the wires. Decided to keep them as they are, because I can’t be bothered to be honest.
How do the actual pictures look? Well, I’m going to be polite and say “quite retro”, which was the original goal of the project. See for yourself:
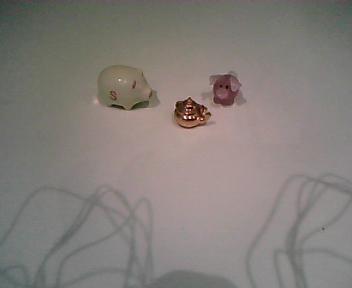


At the least the file sizes are small.
Future Work
Honestly, I think this project could still use plenty of work. Here’s the list of things that could be fixed or improved:
- Make the boot-up time shorter: While it’s delightfully old-school to wait 20 seconds for the camera to start up, it’s also a quite nerve-racking experience to wait every time for almost half a minute to see if the device still works.
- Make the picture capture time shorter: It takes quite a few seconds to take a photo. Well, taking the picture itself is almost immediate, but using
fswebcamis quite slow. - Store the pictures on their own partition: Currently, images are stored in the boot partition because that’s where they can be easily accessed. This is a hilariously bad idea for multiple reasons.
- Audio feedback: It feels weird to use a camera that doesn’t make an artificial shutter sound.
- PTP device: Currently, the SD card needs to be removed from the camera and inserted into a computer to access the images. It’d be nifty if the device could just be plugged into a computer to browse the photos.
- Fix kernel issue at boot: Oh, did I forget to mention that there’s a kernel error message printed during boot? Well, there is. And it should most likely be looked at.
- Create a nice case for the camera: I wish I had a 3D printer to print a case for the camera. I wonder where I could get one. *wink wink nudge nudge*
All in all, I think there are more things that should be done than actually have been done. However, I’m also quite happy with the things that are already done. Good starting point for whatever comes next.
